Once your Google calendar or Outlook calendar has been connected to Keap, you will set up your booking page. In this article you will personalize the attributes of the appointment day and time they can book.
- Set your appointment location, the days and times of the week that clients can schedule with you
- Preview your booking page, then share it with a client or prospects
Important Note! To avoid double booking, make sure all of your calendar appointments are marked as “Busy”. Otherwise, your customers can still schedule during that time frame. This is located in the Google calendar appointment record in the notification area.

Setting appointment preferences
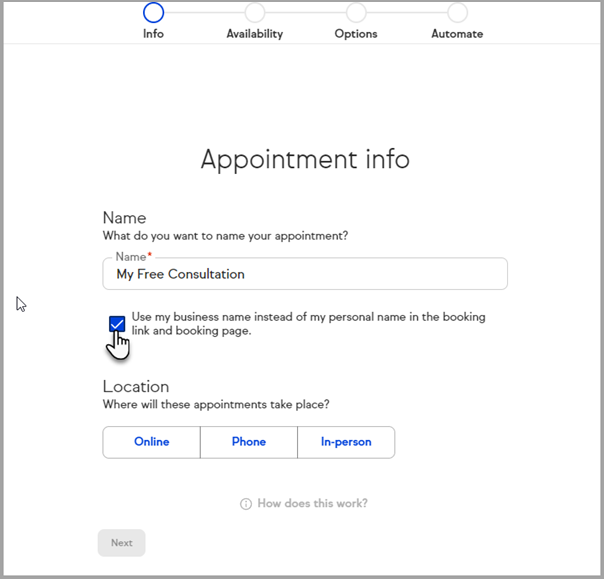
- Enter a name to associate with your appointment link i.e. "Consultation". Note that the name will become the end of the booking URL
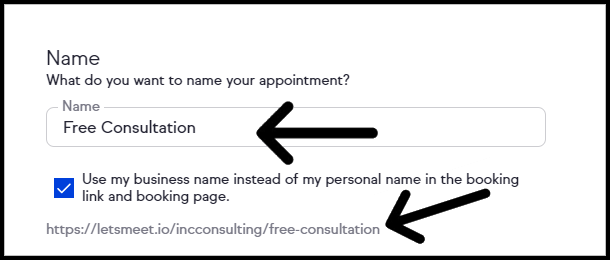
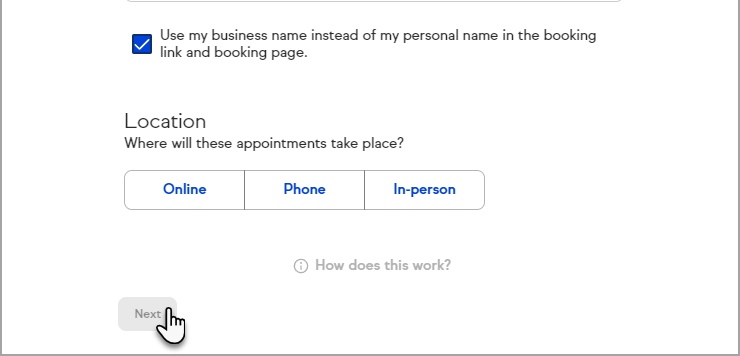
- Click the box to use your business name instead of your personal name in the booking link. Note the business name in the booking link URL.
- Location: Online - You can choose to provide an online meeting link or let the invitee provide a meeting link.
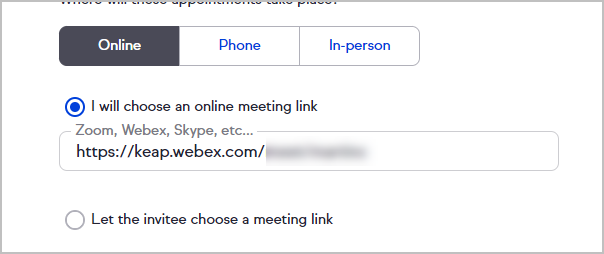
- If Let the invitee choose a meeting link is selected, the invitee will be required to fill the Your online meeting link field on the appointment invitation they receive by email.

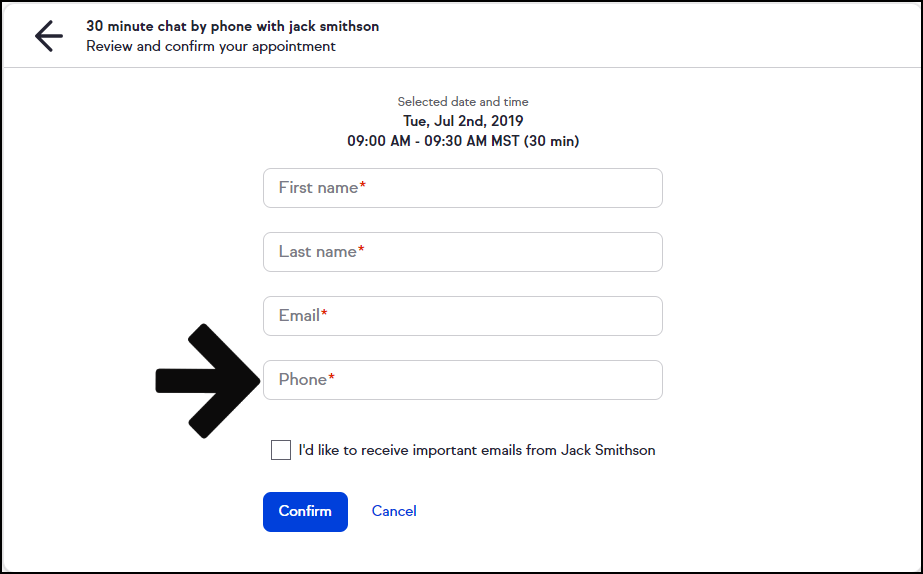
- Location: Phone - You can elect to call the customer (ask the invitee for their phone number) or request the invitee call the user (by providing a phone number to for the invitee to call).
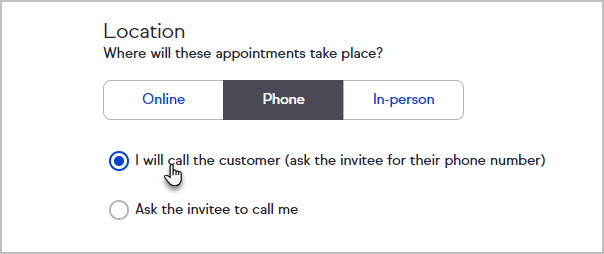
- If I will call the customer is selected, the invitee will be required to fill the phone field on the appointment invitation they receive by email.
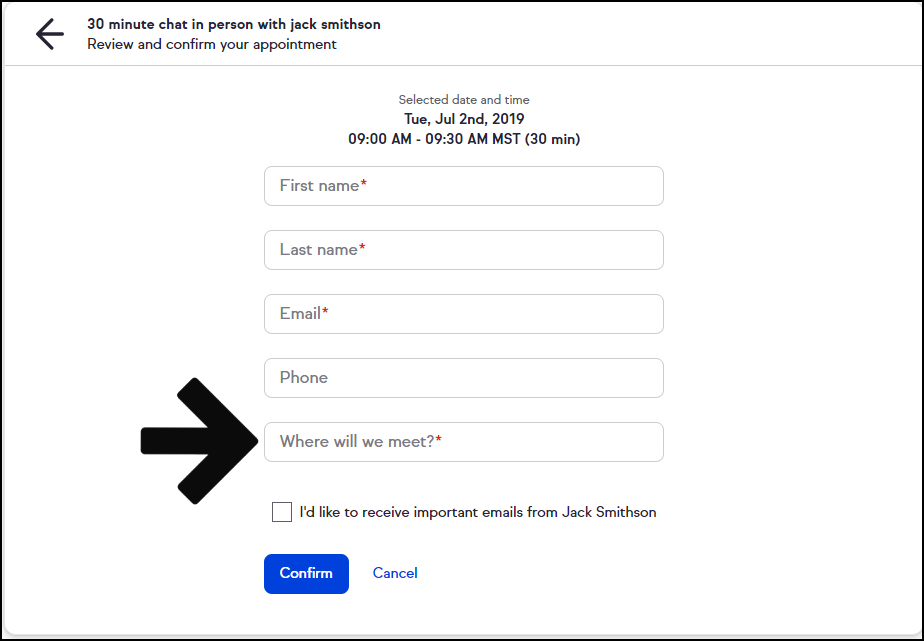
- Location: In Person - The user can elect to choose the meeting location and provide an address, or let the invitee choose the location (request an address from the invitee).
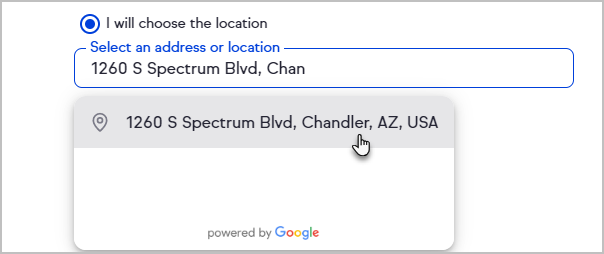
- If Let the invitee choose the location is selected, the invitee will be required to fill the Where will we meet field on the appointment invitation they receive by email.
- Click Next
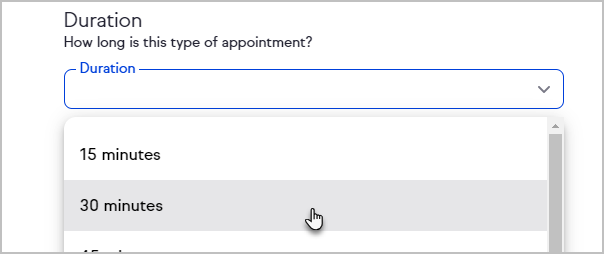
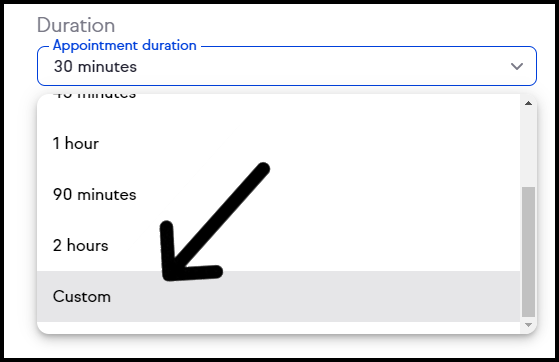
- You can select from the available standard durations (15, 30, 45, 90 minutes, 1 hour, or 2 hours increments)
- Scroll to the bottom of the appointment duration drop-down to select a custom duration.
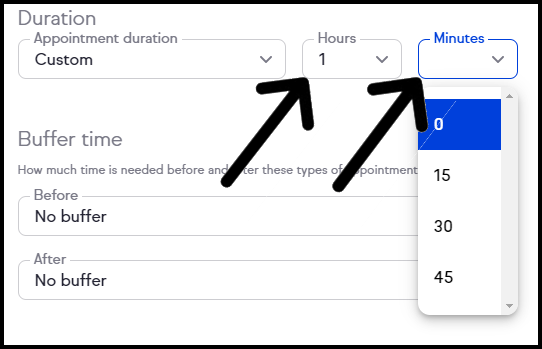
- If Custom duration was selected, select the duration using the Hour and Minute selection boxes
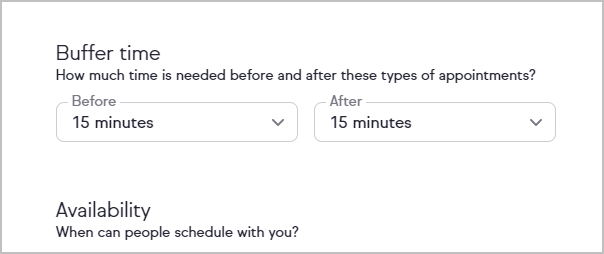
- You have the option of putting a buffer time of 15, 30, or 45 minutes between appointments
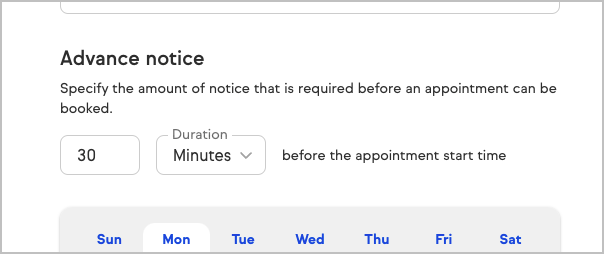
- Specify the amount of time that you will need before an appointment can be booked on your calendar.
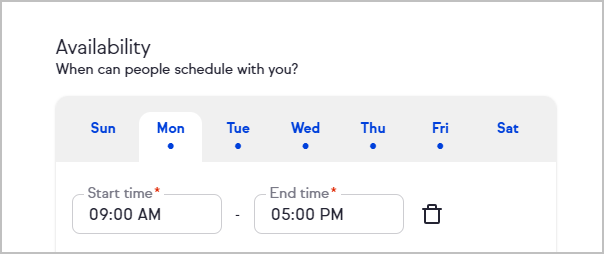
- Choose time frames across any day of the week that you want to be available
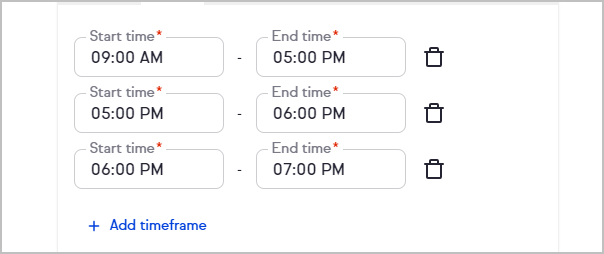
- Click + Add timeframe to add additional timeframes to that day
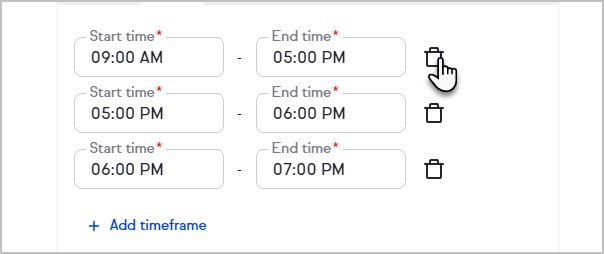
- Click the trash bin button to remove a timeframe
- Once you set the desired days and times click Next
- Activate the toggle to add Pre-appointment instructions
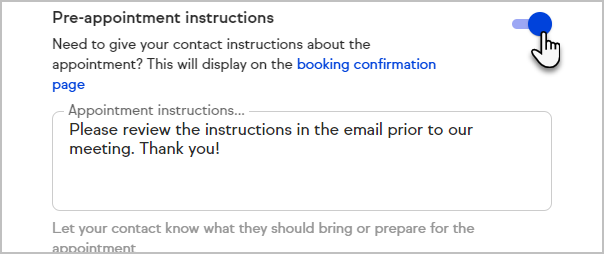
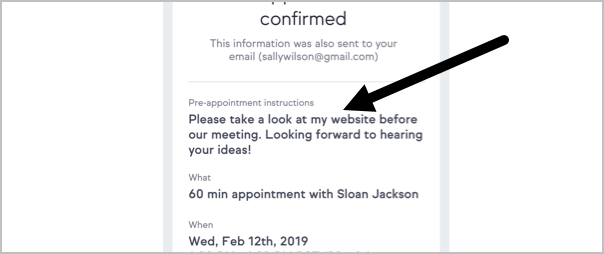
- Your client will see the pre-appointment instructions at the top of the booking confirmation page.
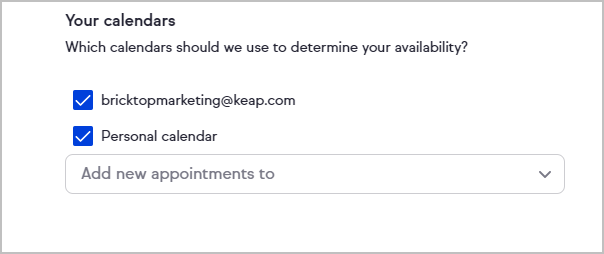
- Select which calendars Keap should use to determine your availability. If you select multiple calendars, you will be prompted to select a calendar for new appointments to be added to by Keap.
- Click Next at the top of the page
- (optional) Add automation. Click the +Create Automation button.
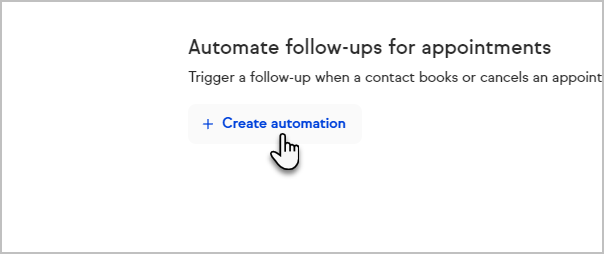
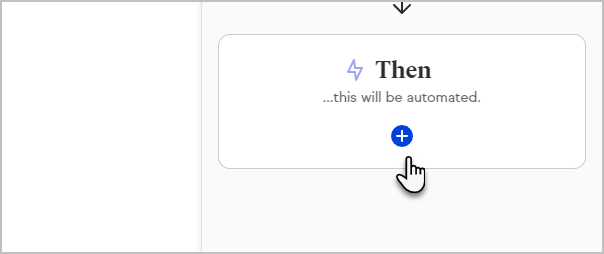
- Click the Then card. and select what action you would like to take place once a consultation is scheduled.
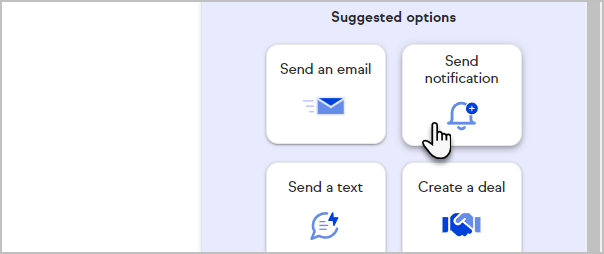
- Now, select what action you would like to take place once a consultation is scheduled. The most common options are at the top, but you can scroll down the panel to see all available options. To learn more about creating Easy Automations, click here
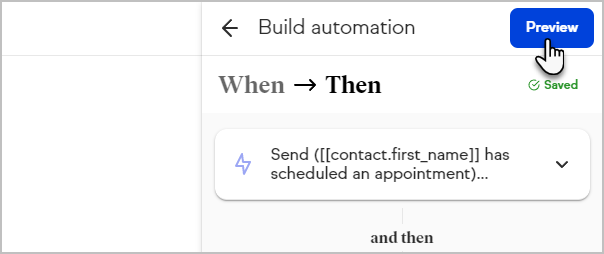
- Click Preview when you are finished.
- When are happy with everything, click the Publish button at the top right of the page.

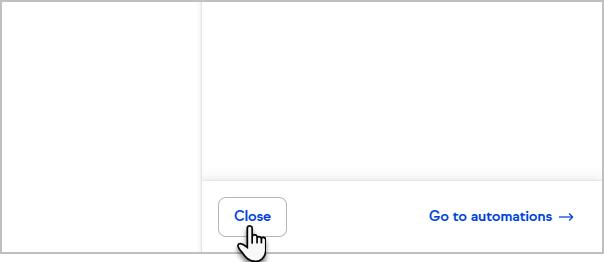
- Click the Close button to close the panel, and then click Finish in the upper right hand corner.
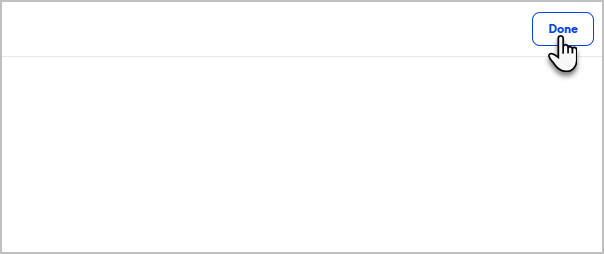
- Click Done to close the Appointment Booking setup page.
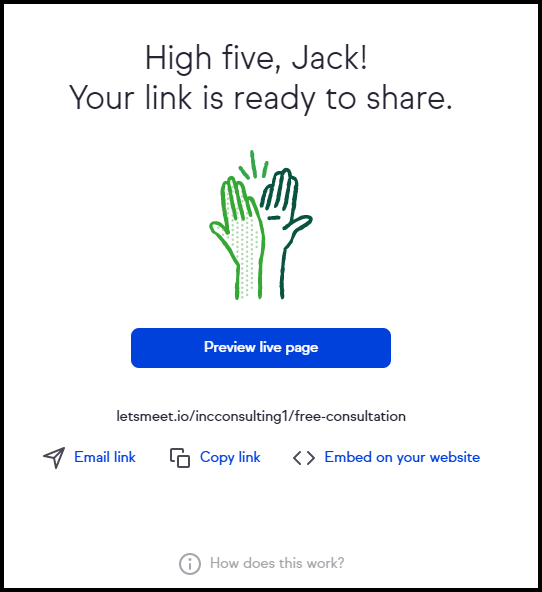
- You can preview the live booking page, Email the booking link, copy the booking link, or access the booking page code snippet to embed on your website.
- Click Done in the upper right hand corner


Pro tip! Your booking page is super smart and knows when it is Daylight Savings, so you will see different times if the dates viewed are after a time change.
CLICK HERE to learn how to embed code on the 3 most popular website platforms (WordPress, Wix, and Squarespace)
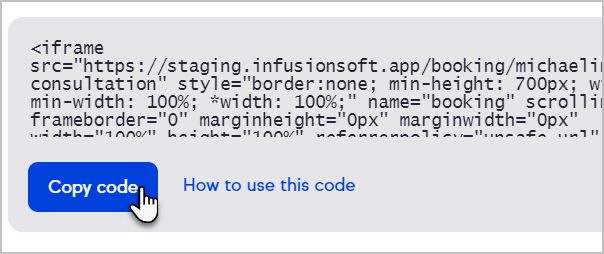
Access embed code from individual booking link
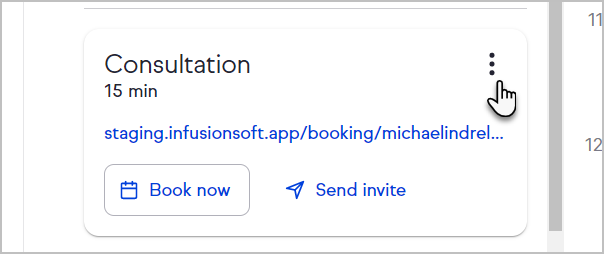
- Open the more options menu for the desired booking link from the Appointments page.
- Click Embed code
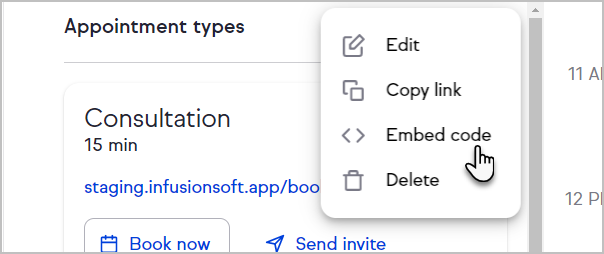
- Click the Copy code button


CLICK HERE to learn how to embed code on the 3 most popular website platforms (WordPress, Wix, and Squarespace)
