Why Domain Authentication is Required
Email providers like Google and Yahoo are now mandating domain authentication to enhance security and combat spam and phishing. By requiring authentication, these providers aim to protect their users and ensure that legitimate emails are delivered to inboxes. Keap is following these industry requirements to give you the best chance for success in your email marketing efforts. To meet these standards, you must send emails from a custom domain that is fully authenticated with DKIM and DMARC. This will not only improve your email deliverability but also help maintain your sender reputation. Follow the steps below or watch the video to get your domain set up properly.
If you'd like to see Greg Jenkins from our partner Monkeypod walk you through the process, simply click the link below.
What are DKIM and DMARC?
- DKIM (DomainKeys Identified Mail): Adds a digital signature to your emails, verifying they were sent from your domain.
- DMARC (Domain-based Message Authentication, Reporting & Conformance): Specifies how email providers should handle unauthorized emails.
Step-by-Step Process for Authenticating Your Domain in Keap
- Access Email Authentication Settings
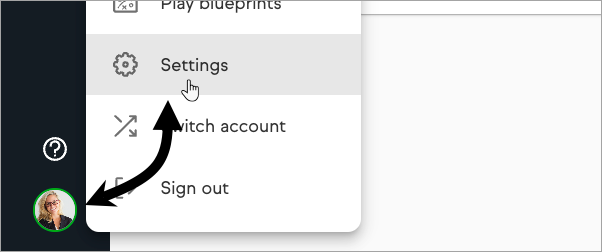
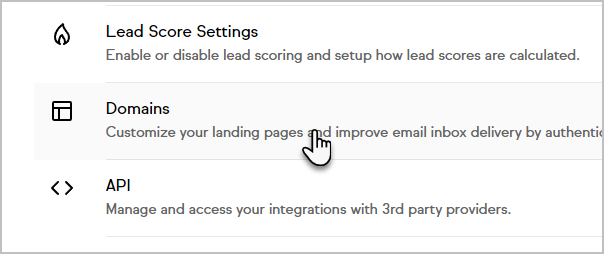
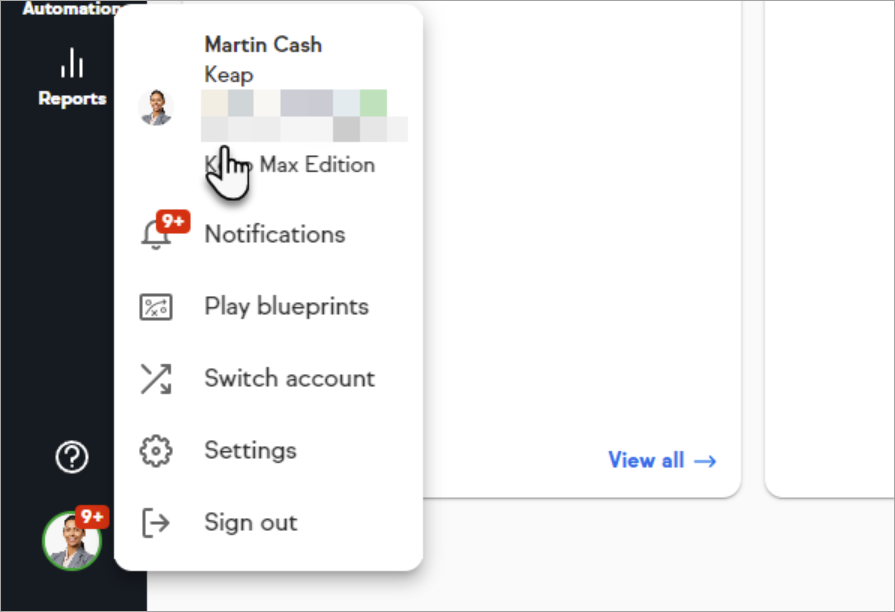
- Pro/Max Edition: Click on your profile picture in the bottom left corner, select Settings, and navigate to the Domains page.
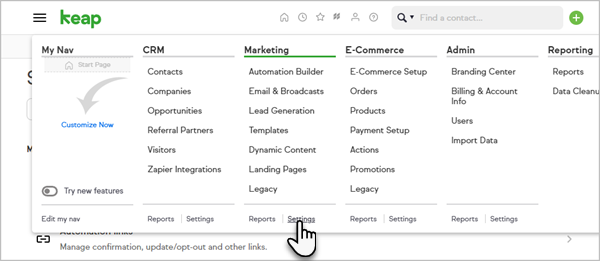
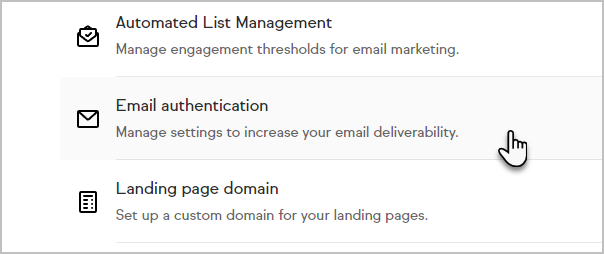
- Ultimate/Classic Edition: Click on the hamburger menu dropdown, select Marketing > Settings, and click on Email Authentication.
- Pro/Max Edition: Click on your profile picture in the bottom left corner, select Settings, and navigate to the Domains page.
- Add Your Domain
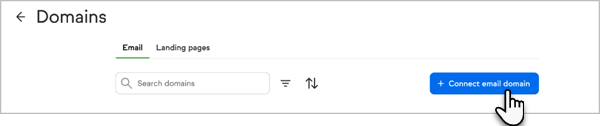
- Click on the + Connect Email Domain button
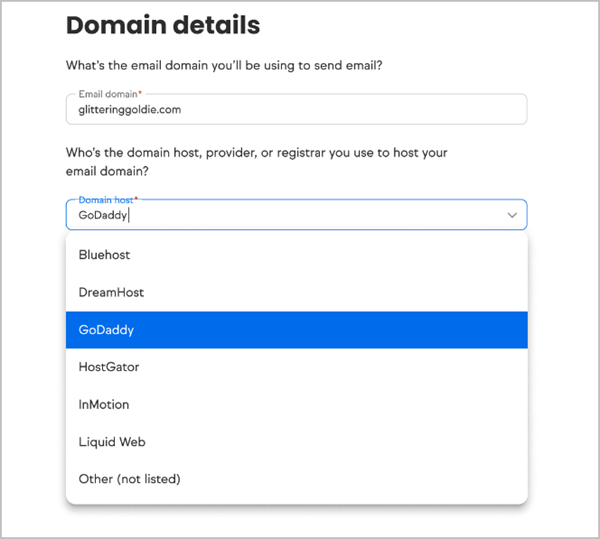
- Enter your domain
- Select your domain host from the dropdown list. If unsure of your domain host, use this tool.
- Verify Your DMARC Record
- Before creating a new DMARC record, it’s important to check if one already exists for your domain—you should only have one DMARC record.
- If you already have a DMARC record, leave the “Create or Update DMARC Record” checkbox unchecked.
- Not sure if you have a DMARC record? Use the free tool from Dmarcian: Just enter your domain and click “Inspect the Domain” to see if a DMARC record is already in place.
- You can also check directly by logging into your DNS provider and reviewing your DNS records for an existing DMARC entry
- Create Your DMARC Record:
- If you do not have a DMARC record, or you want Keap to generate one for you:
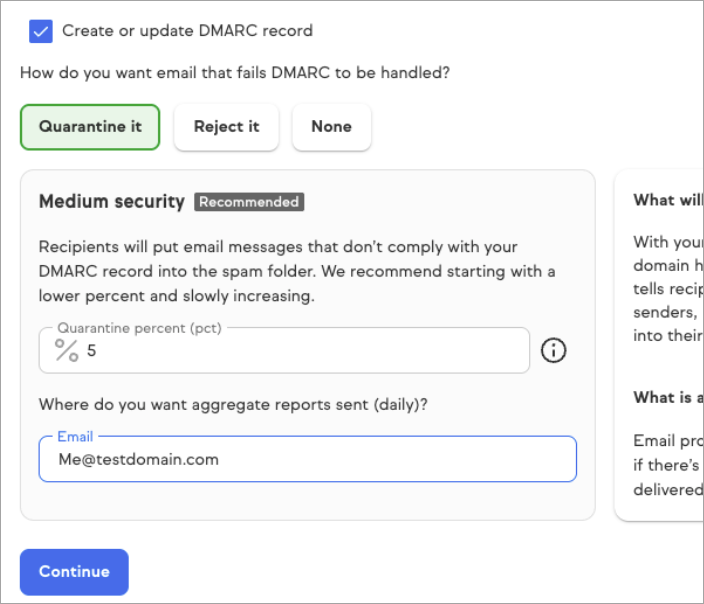
- Check the “Create or Update DMARC Record” box.
- Keap recommends the following settings:
- Policy: Quarantine
- Quarantine Percentage: 5%
- Enter an email address you have access to. This address will receive DMARC aggregate reports from providers to help you monitor for unauthorized use of your domain.
- Generate and Add DKIM & DMARC Records:
- For your DKIM records Keap will generate 3 CNAME records that will look like:
- Click on the record to copy it (do not highlight manually to avoid copying extra text).
- In your domain’s DNS settings, add these as CNAME records:
- Depending on your DNS provider, the fields for entering these keys may be labeled as "Host" and "Points to" or "Name" and "Value." Enter the keys in the provided order, from left to right, regardless of the labeling.
- For adding your DMARC record
- In your domain's DNS settings, add a TXT record for DMARC:
- Host: _dmarc.yourdomain.com
- Value: v=DMARC1; p=quarantine; pct=5; rua=mailto:[email protected]

- In your domain's DNS settings, add a TXT record for DMARC:
- Domain Verification:
- Add all of the keys provided to your DNS provider
- Once all records are added to your DNS provider, click Finish in Keap.
- You’ll return to the Domains or Email Authentication page, where your domain status will show as Pending or Connected.
- It may take 24-48 hours for your domain to connect. If it remains pending for longer, verify your DNS entries using the DIG tool mentioned earlier.
- Start Sending From Your Authenticated Domain
- Once the domain you are wanting to send email from shows as “Connected”
- For Pro/Max navigate to the profile settings page by clicking on the profile icon button in the lower left corner and then click on the top selection to open profile settings
- Once you’ve update the email address to use a connected domain, click update

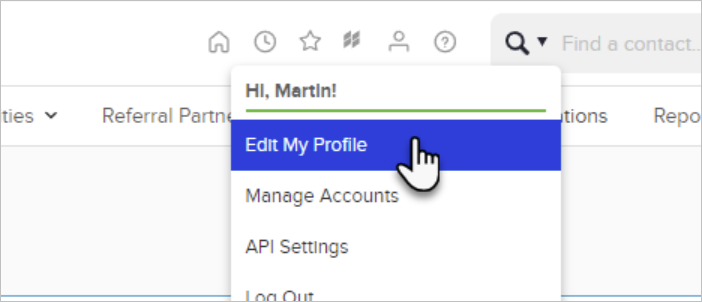
- For Classic to update the email associated with your profile, you will need to click on the profile icon → Edit my profile


Additional help/FAQs
DNS Guides:
You'll need to create CNAME and TXT entries in your DNS records. If you're unsure how, contact your DNS provider for assistance, as steps may vary. Here are links to help articles for common DNS providers:
Handling Domain Conflicts:
- If the CNAME keys are already in use, click on the "Conflict with your domain?" dropdown to enter a custom subdomain prefix.
- If your domain authentication is stuck in "Pending": If you previously had your domain authenticated within Keap and it is stuck in the Pending status for more than 48 hours, you will need to click on the edit button (pictured below) and go through the steps above, if you have already copied over the appropriate records just click confirm when you get to the records page. If your records have been verified it will move into Connected and if it is still verifying it will remain in the Pending status until verification is completed.

