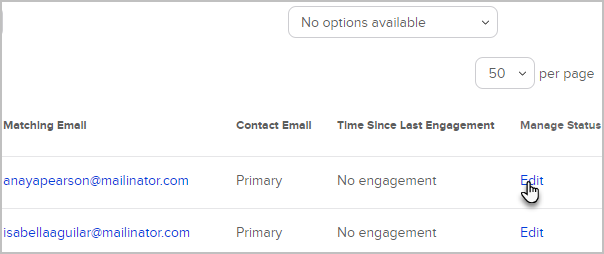
The email status search report will display a list of contacts based on their email status (i.e. bounce, opt-in, opt-out, etc.). Here are the most used search criteria and an example of the results.
Note that when viewing search results on most marketing reports, you have the option of sending a broadcast when viewing the actions drop-down:

Manage the marketability status of contacts
Manage the marketability status of your contact by opting in, validating, sending a confirmation email, or unsubscribing them manually.
Go to Reports in the left menu
Click Email engagement tracker
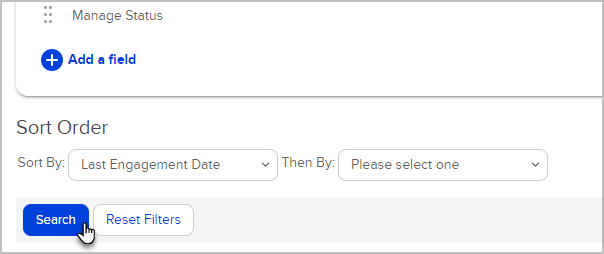
Go to Columns
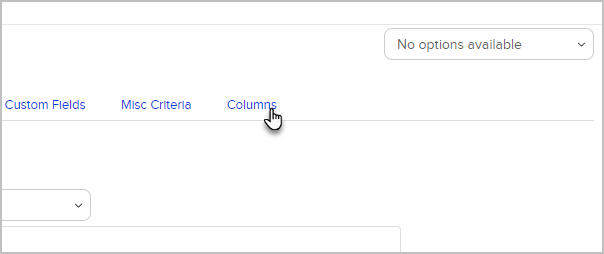
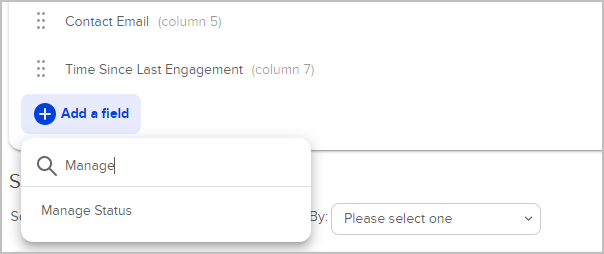
Click Add a field
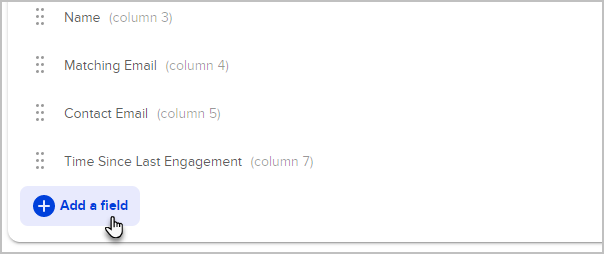
Search for Manage Status
Add any other fields or search criteria
Click Search
Click Edit located under the Manage Status column
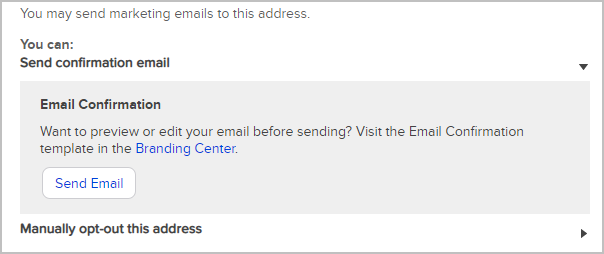
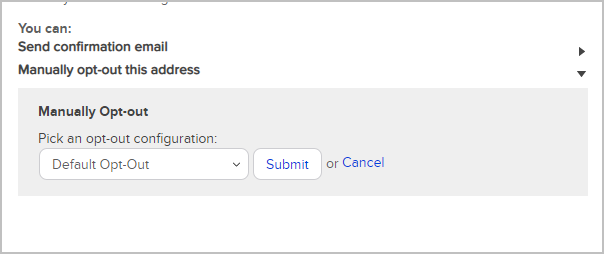
From the Current status tab, you can:
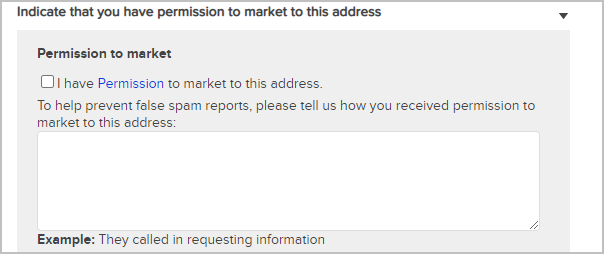
Indicate that you have permission to market to this address - If the contacts were imported and/or manually added without indicating permission, you can indicate it was given here.
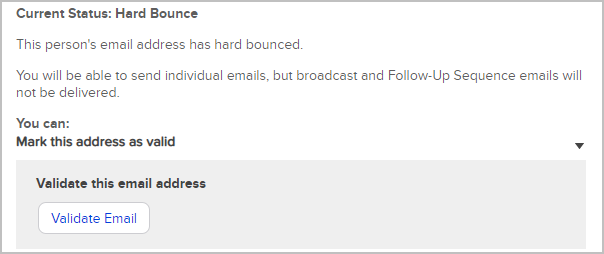
Mark this address as valid - When an email address sends back a hard bounce error you can validate it. For more information regarding email bounce, click here
Send confirmation email - If you have permission to market to an address, you can send a confirmation email including a link the contact can click to confirm their email address.
Manually opt-out this address - select Default Opt-Out from the drop-down list. This contact will no longer receive marketing emails from your automations and broadcasts. You can still send them one-off emails.


Find contacts who reported spam or provided feedback
Go to Reports in the left menu
Click Email engagement tracker
- Add the Provided Feedback and Reported Spam email statuses to your search criteria and ensure the Email Status option is set to "contacts any"
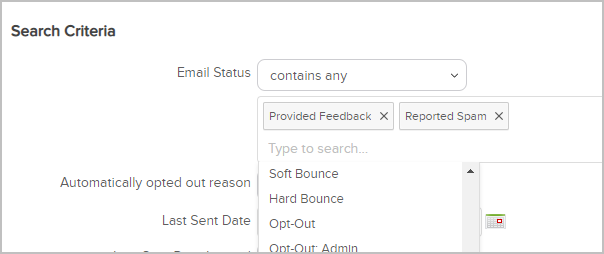
- Provided Feedback: The person marked the email as spam through their ISP (e.g. AT&T, CenturyLink, etc.)
- Reported Spam: The person marked the email as spam through an Keap opt-out link. When this happens, the person has the option to add additional feedback
- Open the Columns tab
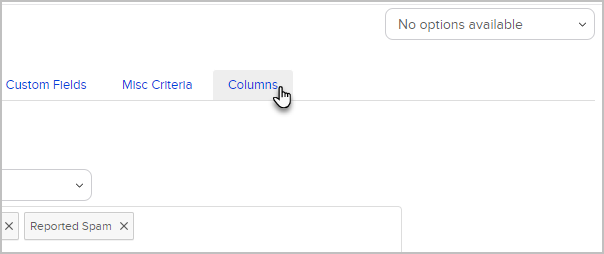
- Click Add a field
- Add the Status and Manage status fields along with any other fields you want to include in your search results
- Click Search

- Click Edit located under the Manage Status column
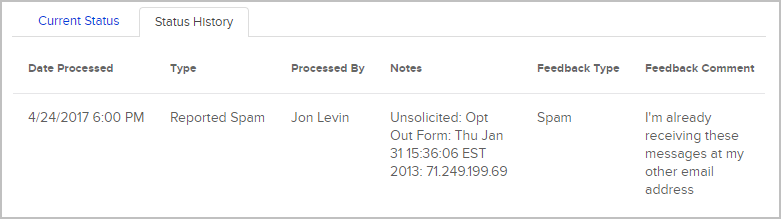
- Open the Status History tab to read the comments the contact posted when they registered an internal spam complaint.
- Comments are not required. If you do not see any comments, the person who submitted the spam complaint did not post a comment.