Contact lists are a helpful and useful tool to target a segment of your contacts for communication or other action. Using specific criteria, you can filter your contacts or create a List, which will allow you to quickly take action (i.e. "Potential leads" - follow up, sending email, etc.)
Filter contacts
You can filter contact based on nearly any piece of the contact record including contact fields, custom fields, tags, or even phone type.
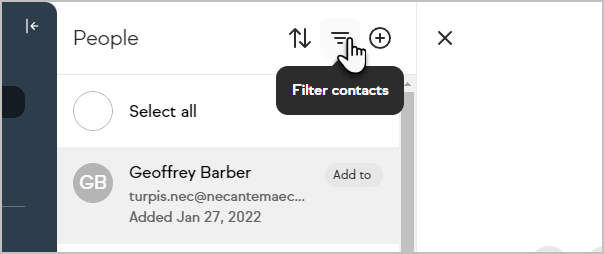
Navigate to your Contacts
Click on the Filter button
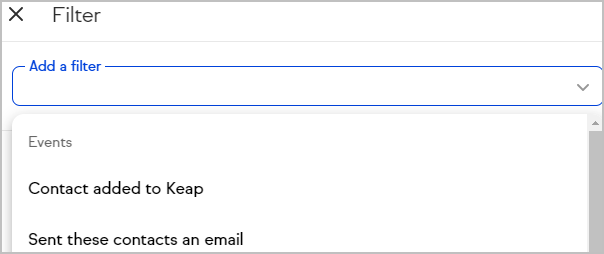
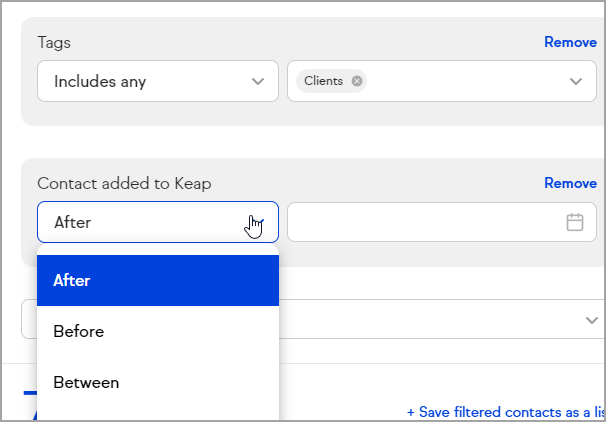
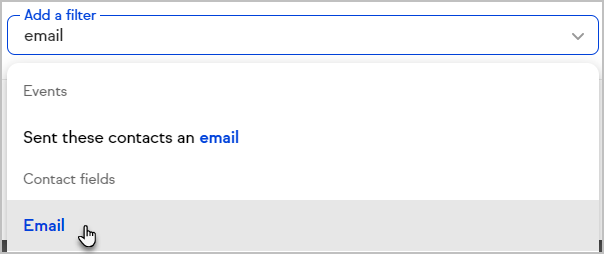
Click the Add a filter drop-down, and select a filter from the the drop down menu. Filters can be events, tags, or fields from the contact record
Many filter include additional criteria allowing you to include or exclude criteria.
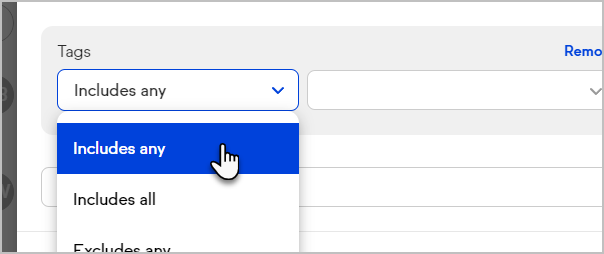
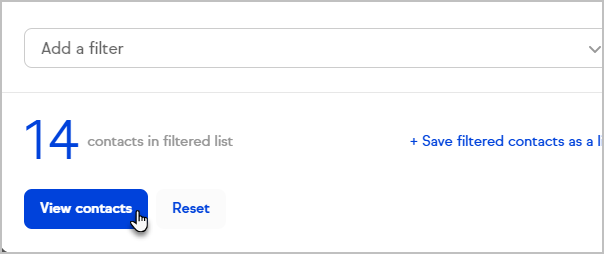
You can stack criteria as needed for precise list creation.
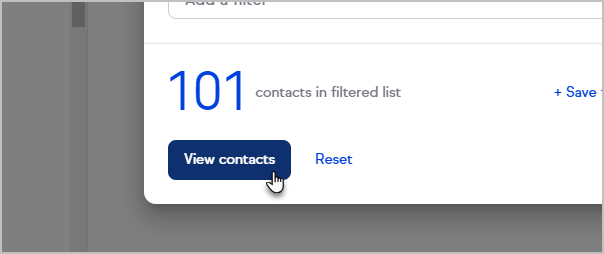
Click the View contacts button to see the list of contacts that match the criteria
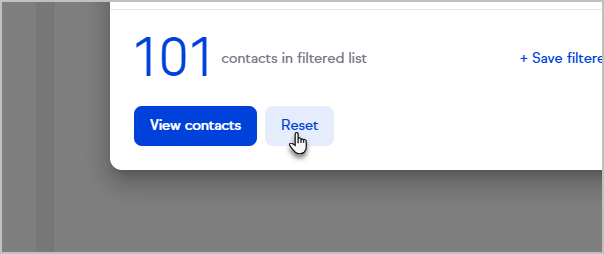
To adjust or remove your filter, click the Filter button and click the Reset button


Pro-Tip! In Filters you can use multiple criteria in the same filter by separating with a comma. Example: Email filter that contains Keap or Gmail, use the email filter contains> "keap, gmail"
Create a contact group
Pro Tip! Saved contact groups are updated in real time to include contacts that meet the criteria set in your filters. A contact may also be removed from the saved contact list if the contact no longer meets the criteria set in your filters.
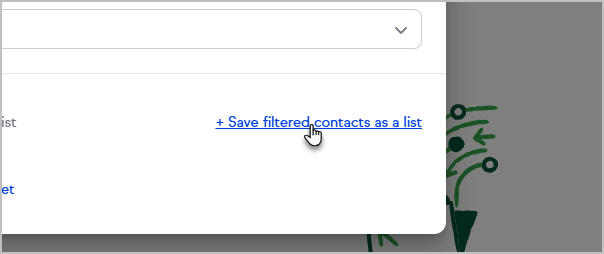
Enter criteria to filter your contacts
Click on the Save filtered contacts as a list
- Enter a name and click Save
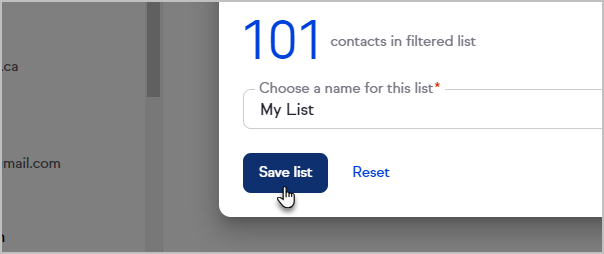
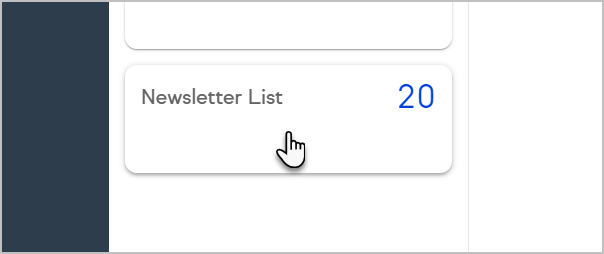
- The new list will be added to your Contact groups

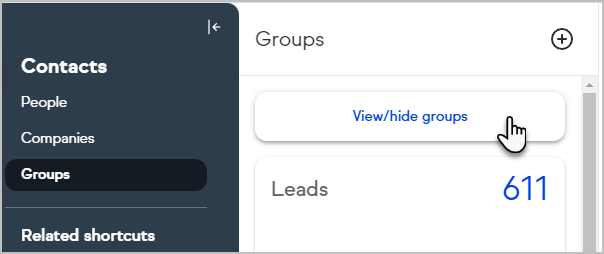
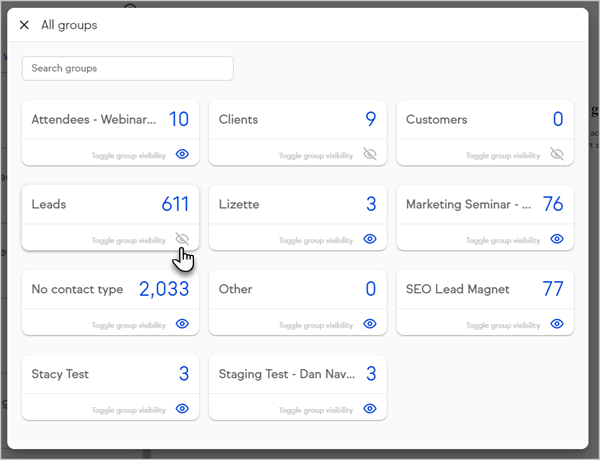
- Click View/hide groups to view all of your groups, and toggle visibility of groups.


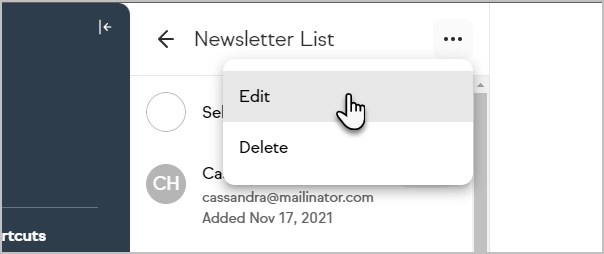
Update a saved contact group
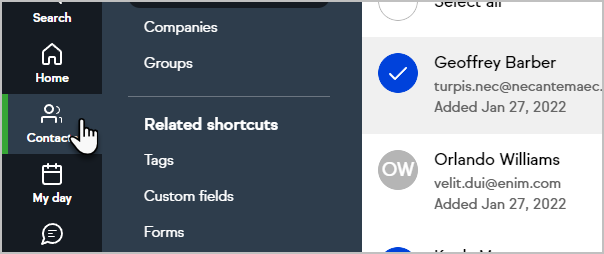
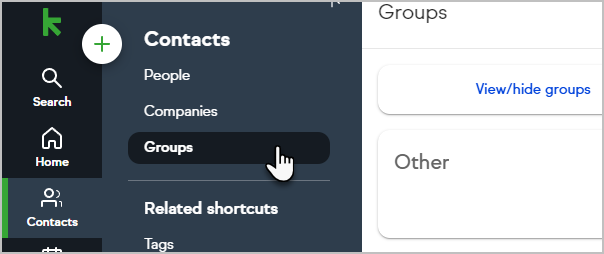
Navigate to Contacts > Groups
Select a group
Click the ellipses button and choose Edit
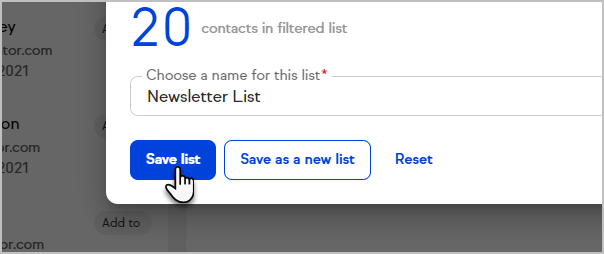
Adjust the criteria and click Save list or Save as a new list


View/Hide Groups
Have a more efficient workflow and less cluttered workspace with the ability to hide Contact groups that you don’t use very often.
- Click the View/hide groups button at the top of the groups list
- Select which groups you want to show or hide in your view

Sort contacts
By default your contacts are sorted by date added, newest first. You can change this with the sort button on your all contacts tab or when viewing the contacts associated with a company. After you log out, your contacts will return to being sorted by date added, newest first.
- Navigate to your Contacts
- Click the Sort button
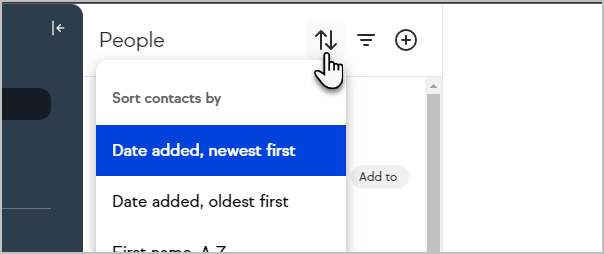
- Select an option to sort your contact list

Find contacts by Phone type
Filtering by Phone type can be very useful when creating a saved list to target in your text message broadcast or automated text message
You could have a contact’s number marked as “Work”, when it is, in fact, a text capable number (on a mobile network). Or you may have text capable numbers classified as “Other” from a contact import from another system. This filter allows you to target those contacts so you can update their phone number type for accurate classification or communication.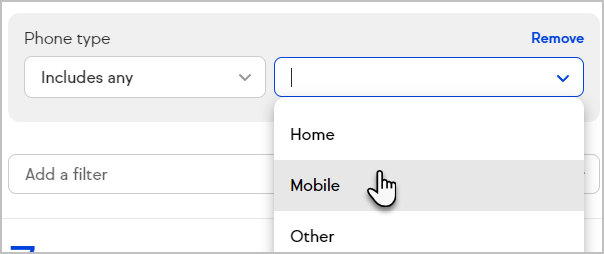
Find contacts without information
You can create a filter to find contacts that are missing information, such as a phone number or email address.
When using the filter for email, phone, or fax fields, Keap will search all standard types (work, personal, other, mobile), but does not search any custom fields that are a phone or email type. Custom phone and email fields can be filtered by "is empty" or "is filled" individually.
- Create a filter
- Add a field to the filter
- Select Is empty
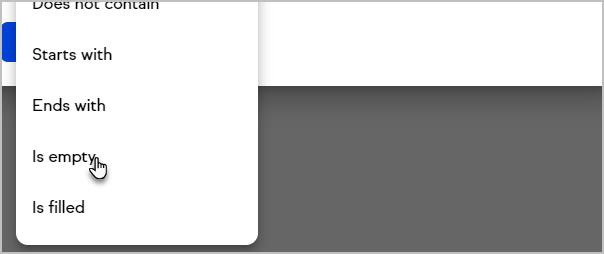
- Click View contacts to see a list of contacts where the field is empty or save the filter as a list